Visual Studio Code
A widely available and versatile code editor that supports remote development via SSH.
Options#
There are two ways to use VS Code on the FSU HPC:
- Install and use VS Code in the RCC Desktop interactive app via our Open OnDemand portal.
- Run VS Code on your local workstation and connect directly to an HPC compute node through an SSH tunnel.
VS Code in Open OnDemand#
This method is the more straightforward of the two options for VS Code, but it does require some initial setup.
- Follow the instructions for launching an interactive app in Open OnDemand.
- Select the RCC Desktop app.
- Important: Ensure that the Internet Access via Web Proxy checkbox is selected.
- Install VS Code (first time only)
- Open the web browser from the Applications menu or the quick access toolbar at the bottom of the screen (the globe icon)
- Go to https://code.visualstudio.com/Download and select the .tar.gz x64 option.

- Open the terminal app from the Applications menu or the quick-access toolbar at the bottom of the screen (the black icon)
- Run the following commands to extract the application:
- Launch VS Code
- From the Applications menu in the upper-left corner of the screen, select Run program...
- Enter
~/Downloads/VSCode-linux-x64/bin/codeand click "Launch".
Tip
You can move the VS Code installation folder anywhere in your home directory. Because your environment and extensions
are stored separately in the ~/.vscode folder, moving the core application runtime files will not disrupt your settings.
Remote connection from your workstation#
This is the more advanced of the two options for VS Code, and it requires additional configuration on your workstation. However, this method provides direct access to a compute node from a VS Code session running on your computer.
Initial setup#
- Download and install VS Code from the Visual Studio Code website.
- Install the "Remote - SSH" extension in VS Code.
- Set up SSH keys following our SSH instructions.
- Configure tunneling in your SSH configuration file.
- Open the terminal app on Linux or macOS, or open PowerShell on Windows.
- Copy the following lines into the file, replacing
[YOUR_HPC_USERNAME]with your HPC username: - Save the file and test the connection:
Each time you connect#
- Open VS Code and invoke a terminal (Ctrl+Shift+`).
- In the VS Code terminal, log in to the HPC and allocate resources on a compute node for your session:
- Note the node name in the last line of the
sallocoutput:hpc-r29-1-4. - Important: Do not close this terminal tab. Closing the terminal or terminating this SSH session will automatically cancel your Slurm allocation, causing your VS Code remote connection to drop.
- In the lower-left corner of the window, click the
><icon to connect to a remote system: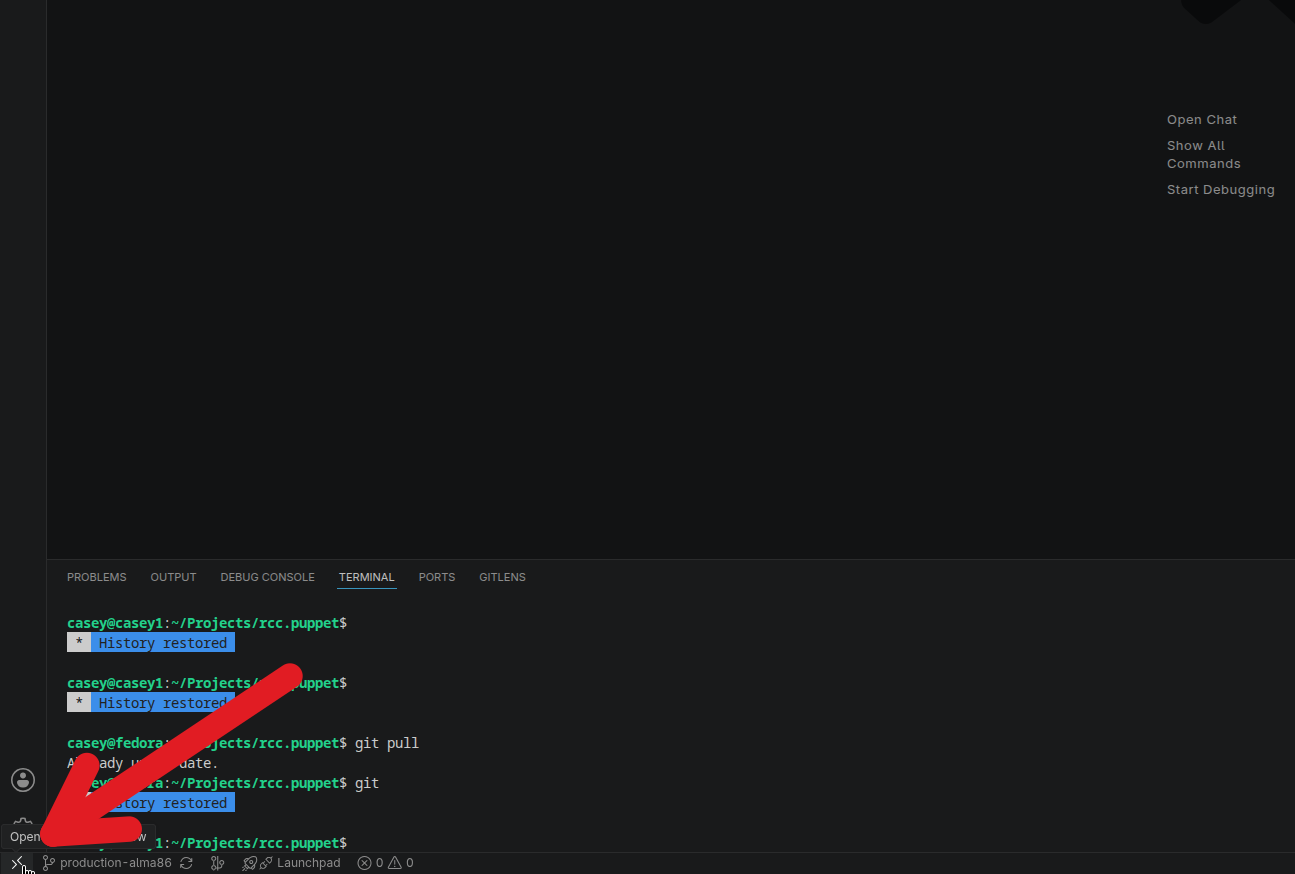
- Select Connect to Host... (do not select Connect current window to host; this option will terminate your Slurm allocation):

- Type the hostname from the
sallocoutput in step 2:
- You may see the message similar to the
The authenticity of this host can't be established. Type "yes" in the text input box and press Enter to continue:
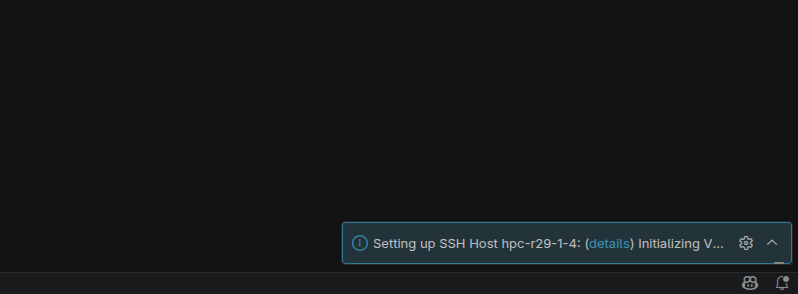
- In the lower-right corner of the window, you will see a message while VS Code sets up the remote connection. This might take a few minutes:
- If everything worked, the indicator in the lower-left corner of the window will show the compute node you are connected to:

- If you need Internet access from the compute node, open a terminal window in VS Code by selecting Terminal → New Terminal or pressing Ctrl+Shift+`, then run:
AI Agents with VSCode#
If you are using an AI agent extension (like Codex or Gemini Code Assist) in VS Code, you will likely need to perform some additional configuration.
The webproxy environment module usually provides Internet access from compute nodes. But AI agents often spawn subprocesses
in VS Code that do not inherit the full environment configured in BASH sessions, even if those sessions were initiated in
the VS Code terminal.
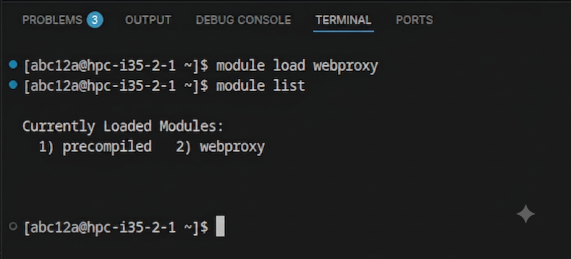
- In a VS Code terminal window (Ctrl+Shift+`), ensure that the
webproxymodule is loaded:
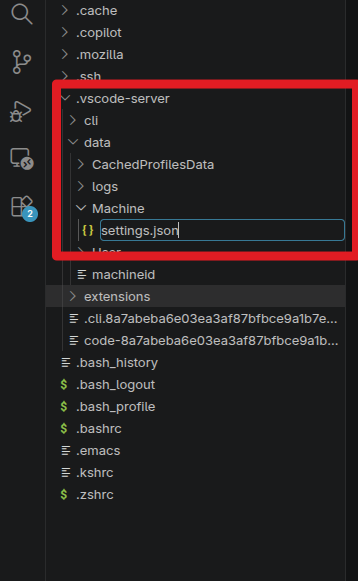
- In the left-hand project navigation window, browse to
~/.vscode-server/data/Machineand open or create thesettings.jsonfile:
- If the file is new or empty, paste the following content into the file:
- If the file already exists and contains existing JSON content, insert the values before the closing brace (
}) at the end of the file. - Reload the VSCode window (this will not break your remote session):
- Type Ctrl+Shift+P to invoke the quick action pane.
- Type
Developer:Reload Window - Press Enter
Your AI agent extension should now be able to connect to the Internet.