OOD Interactive Apps
Launching Interactive Sessions on Open OnDemand#
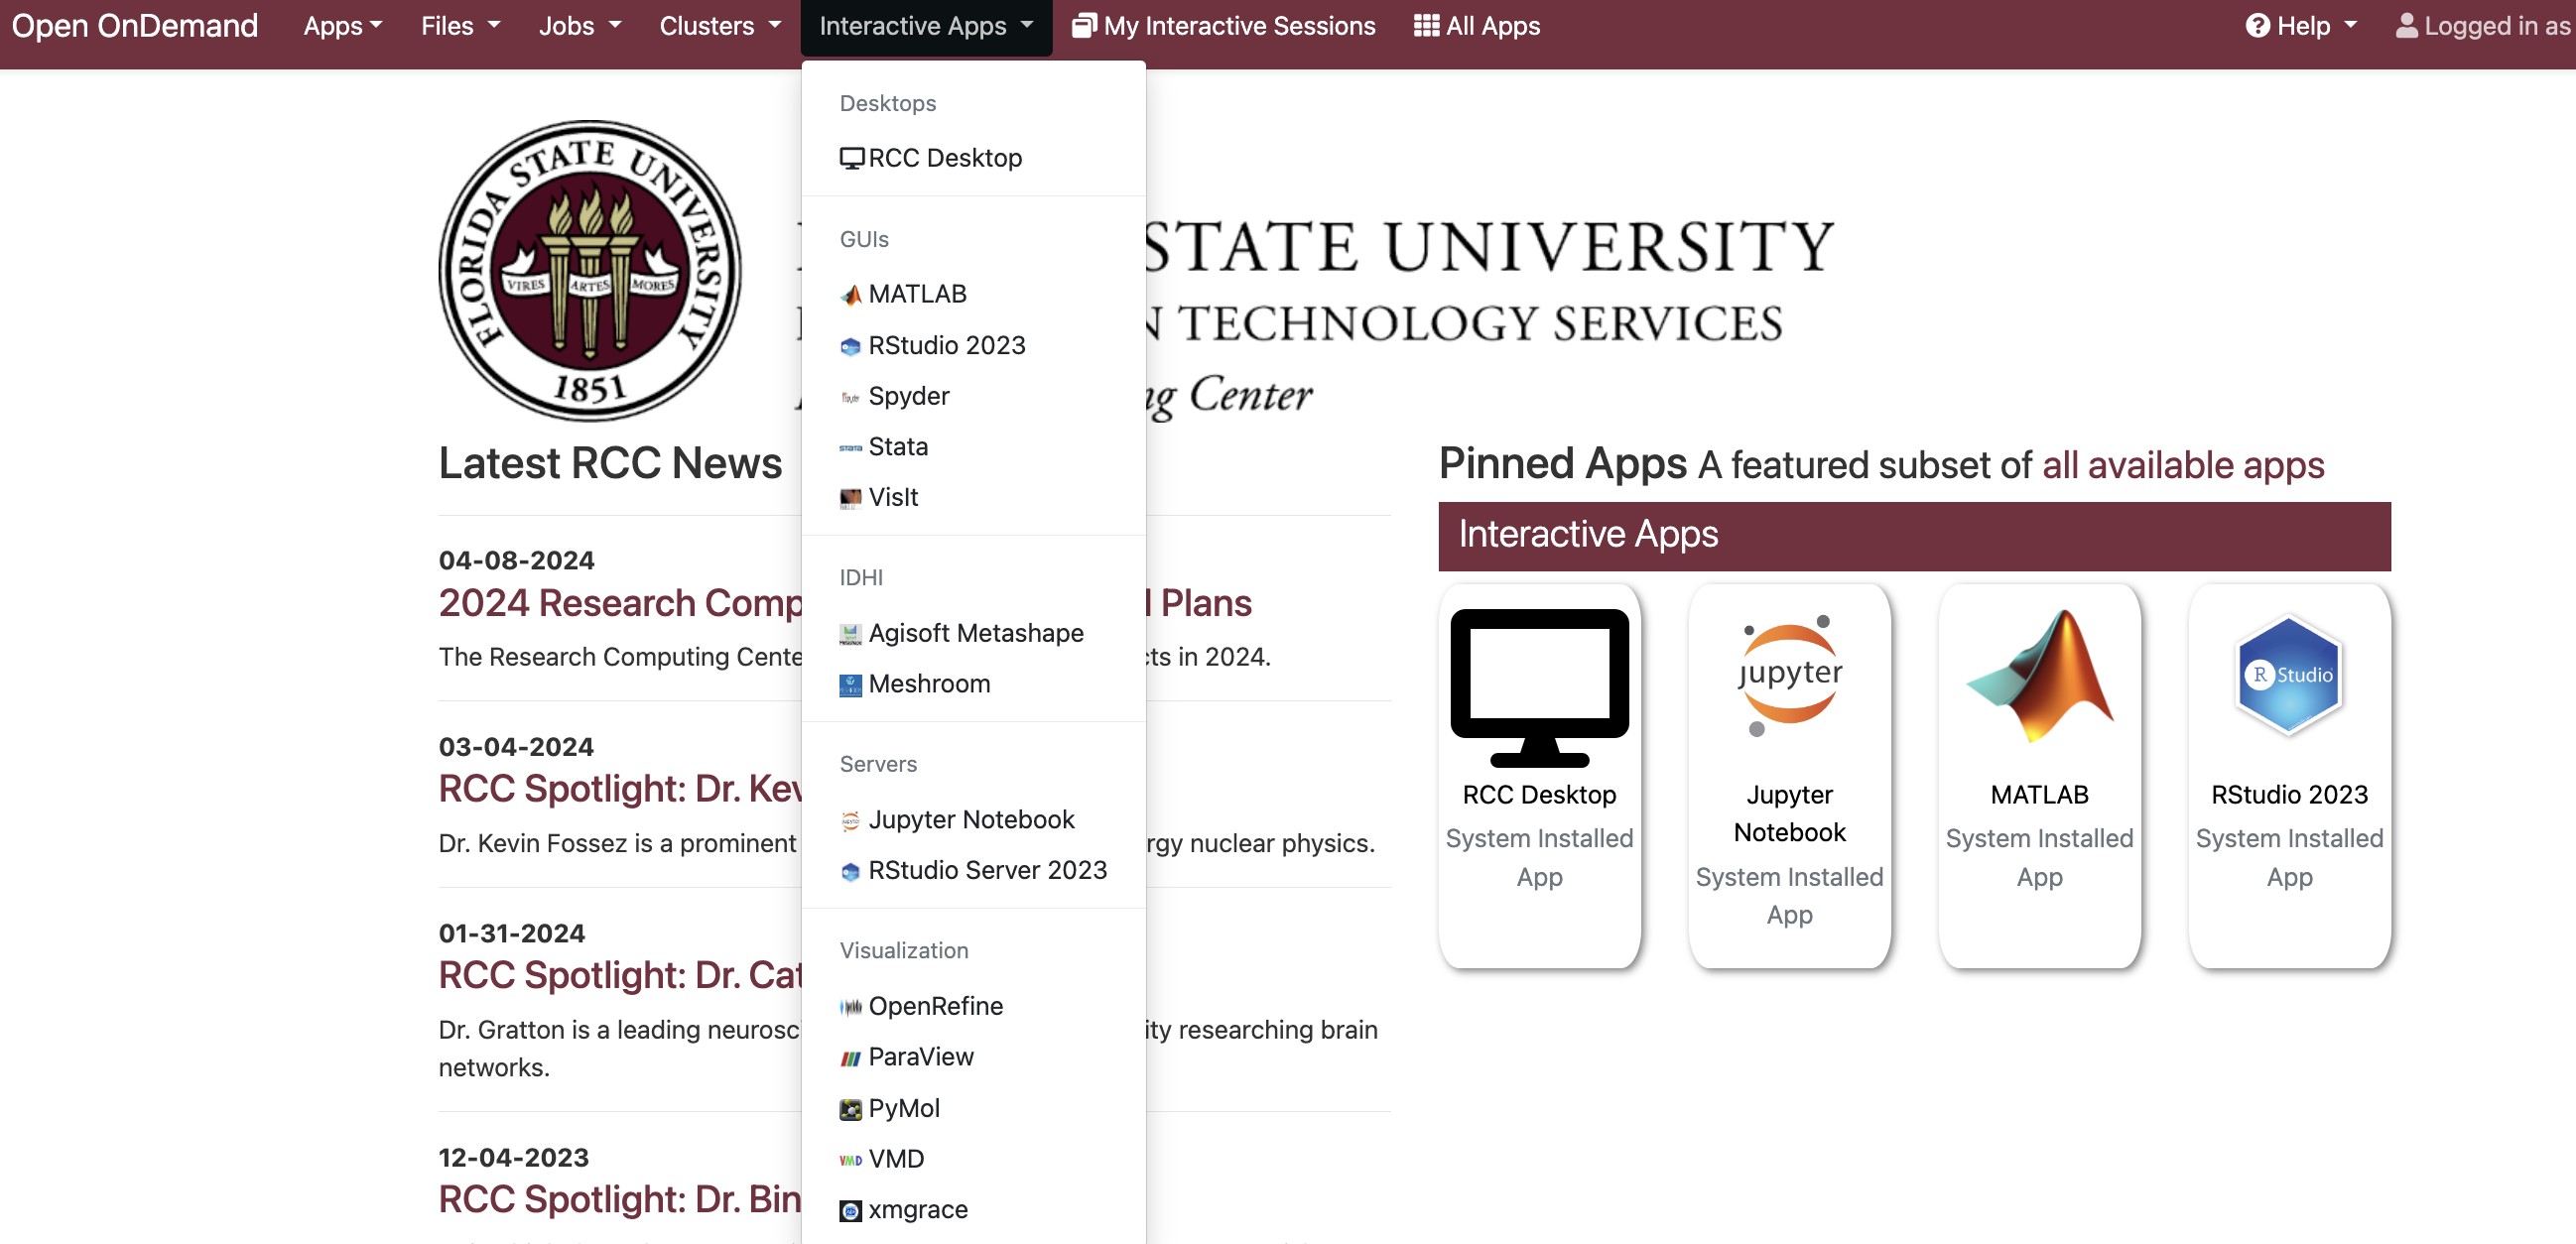
This section enables users to launch interactive sessions with various applications available on the HPC system. The Dashboard page offers three launch options for starting these interactive sessions:
- Interactive Apps dropdown menu: This navigation bar item provides a list of applications for rapid access.
- All Apps Icon: This navigation bar item grants access to the comprehensive library of available applications within the HPC system.
- Pinned Apps Tab: This tab allows users to create an accessible list of frequently used applications for expedited access.
Select an application#
Upon selection of a tab, icon, or specific application from the available list on the Dashboard, you will be automatically directed to the corresponding application submission page.
Job submission form#
The job submission form offers a straightforward way to specify the resources (such as CPU cores and memory) that your session will utilize:
-
SLURM Account: Selecting an appropriate SLURM account will help you finish the work quickly and reliably. Consider SLURM accounts as queues or partitions where your jobs wait for their turn to execute on the HPC system. The RCC offers two options:
-
General Access Account: These accounts, like genacc_q, backfill, backfill2, and condor accounts, are available to a broader user base. The quickTest account is designed for short testing jobs. Refer to our Slurm Accounts page for more information about general access accounts.
-
Owner Account: Research group accounts provide access to specialized computational resources beyond the standard user allocation. Typically, research groups get their own Slurm account when they purchase dedicated resources on our system. For inquiries regarding prioritized job scheduling, dedicated job queues, and resource configurations, please contact the RCC.
-
-
Number of hours: Define the maximum time for your job execution. Slurm, the job scheduler, imposes strict time limits per account, so ensure that the requested runtime remains within the allocated limits for your SLURM account. This helps prevent job interruptions. Note that larger values can mean longer wait times in-queue for your job. See our job resource planning page for more information.
-
Amount of memory requested: Indicate the total memory required per node for the application. Include the unit in gigabytes (G), for example, 2G or 10G.
-
Number of nodes: Most jobs run on a single node. If your job supports parallelization through MPI, MVAPICH2, or another mechanism, specify the number of nodes required here.
-
Number of cores: Indicate the number of CPU cores needed for your job execution. This defines the total processing power allocated to your task.
-
GPUs (optional): If your job requires GPUs (CUDA, Pytorch, Tensorflow, etc.), set this to the number of GPU cards that you need (maximum of 4 for most Slurm Accounts). If you don't need any GPUs for your job, set this to 0.
- Important note: Using GPUs can significantly increase the time your job waits in-queue due to higher demand and limited availability.
-
Email: Check this box to receive an email when your job starts.
Launch the session#
To submit the job, click on the blue Launch button. This will initiate the scheduling process, placing this job in the queue for the Slurm account you selected. Jobs are prioritized by the scheduler considering factors like requested resources and estimated runtime. Once submitted, your job's status will change to "Queued," indicating its position within the HPC queue, awaiting available resources for execution.
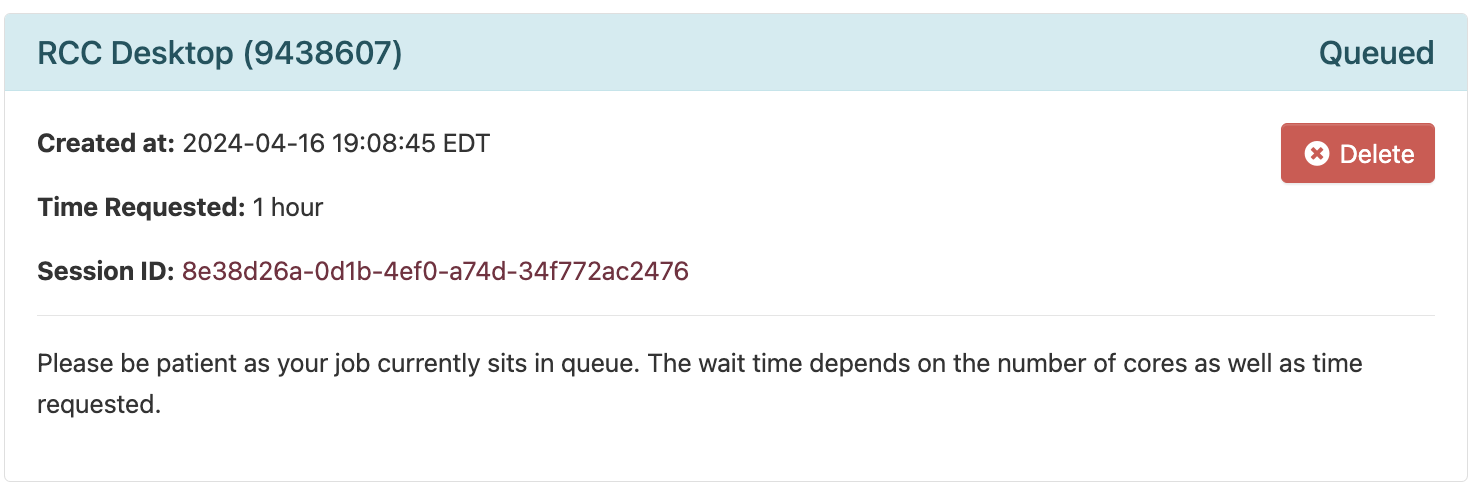
Note
Due to multiple factors such as load on the HPC system and your job parameters, the time your job spends waiting in-queue may vary.
Upon reaching the front of the queue and securing the necessary resources, the job dialog will switch to the "Starting" state. This indicates that the system is either allocating the requested computational resources or configuring a virtual environment if you requested one.
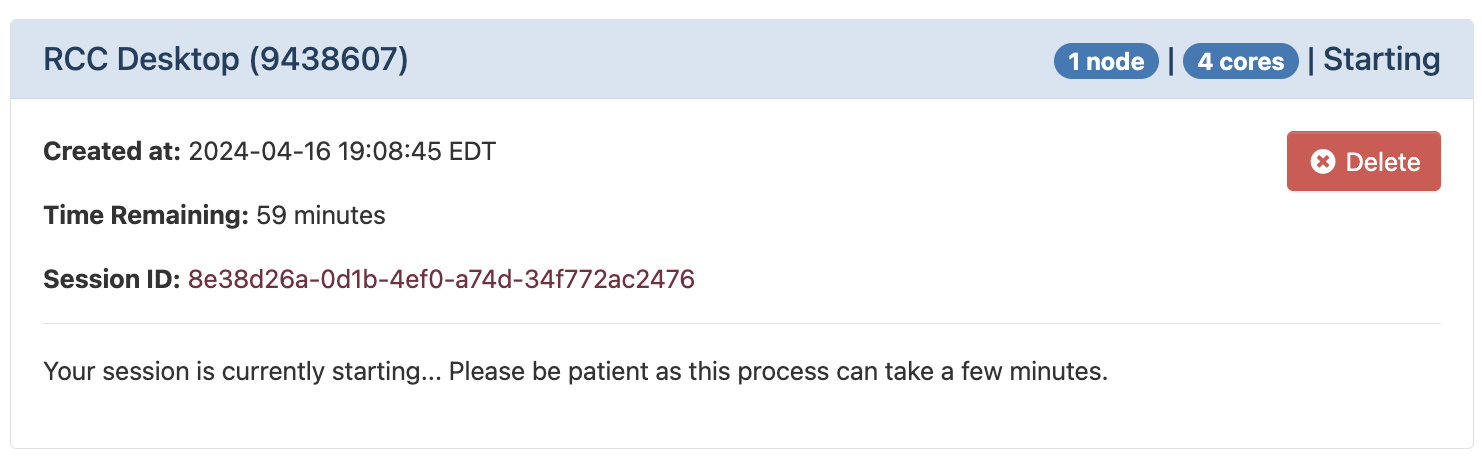
This option allows you to track the job's start time and then proceed to launch the RCC Desktop application for remote access and interaction. Clicking the Launch button when the job status changes to "Running" will initiate the connection to your job's execution environment.
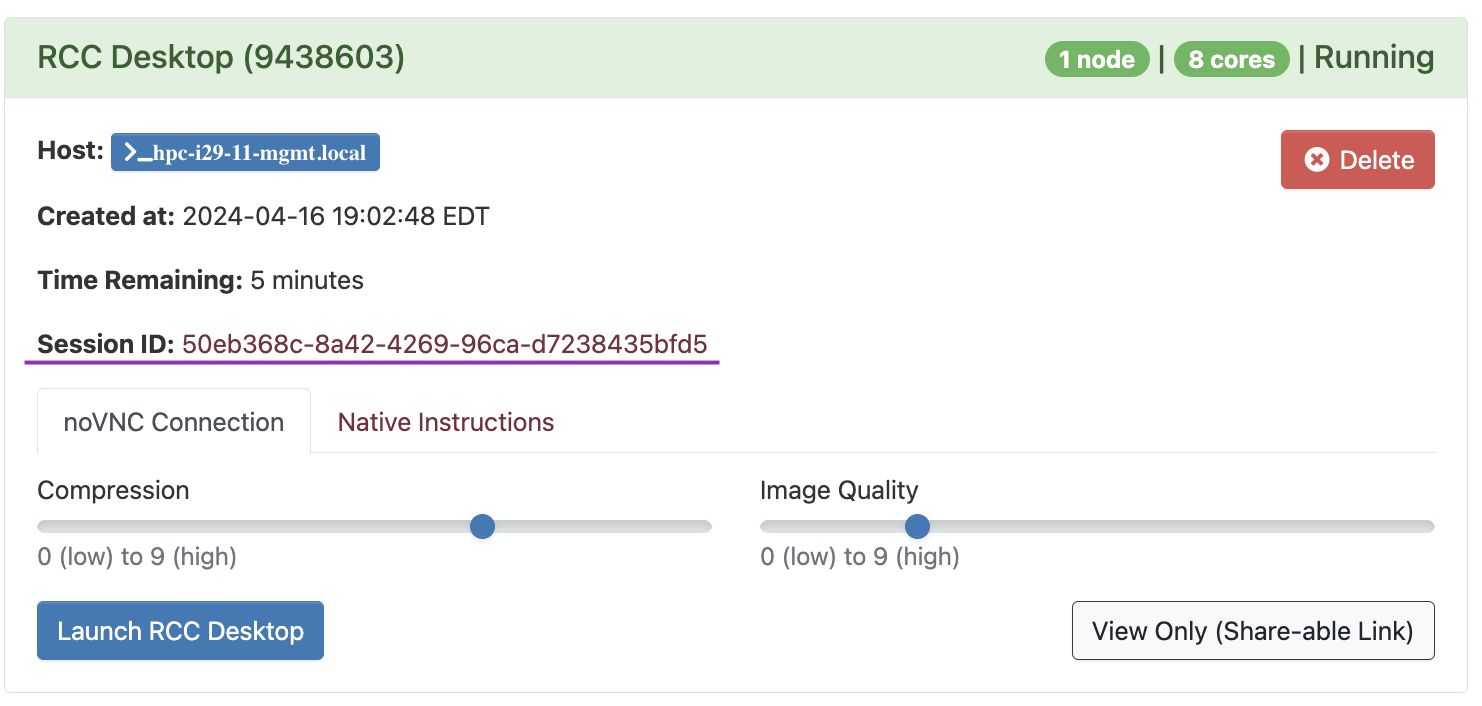
Managing interactive sessions#
Session ID and files#
Upon successful job launch, a unique identifier will be generated and presented as a Session ID. Clicking this session ID will open a new window or tab the Open OnDemand file browser at the path for your running job. This allows you to access the files generated during the computational process.

Logs and troubleshooting#
The path associated with your job execution includes an output.log file. This file acts as a comprehensive record of the job's activity, capturing a detailed log of all events.
This detailed log data provides assistance in troubleshooting any potential errors or issues encountered during the job's execution.
You can access and view this log directly within the web browser or download them for further in-depth analysis.
Terminating a Session#
To manually terminate an Interactive App session, click the "Delete" button in the upper right-hand corner of the job card. Doing this will actively terminate the session and release the allocated resources. This ensures efficient resource utilization within the HPC.
Alternatively, the interactive session will automatically terminate upon reaching its pre-allocated runtime limit.
Application-Specific Settings#
Additional specifications may be necessary depending on the selected application:
RCC Desktop#
The Desktop provides full access to a desktop environment. You can use this environment to access any application on the HPC regardless of whether it is command-line or graphical.
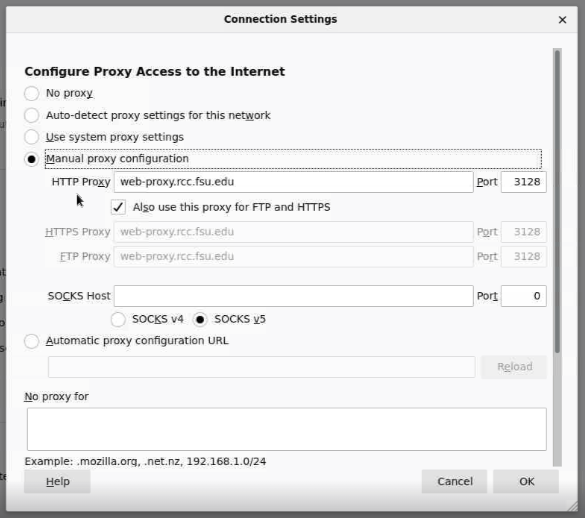
Firefox Proxy Settings#
Sometimes, the Firefox web browser in the Open OnDemand desktop environment can't reach the Internet. Perform the following steps to remedy:
- Open the Firefox application
- Open the "hamburger" menu ("☰") on the far right side of the address bar
- Select Preferences from the context menu
- Scroll down to the Network Settings heading and click the Settings button
- Change Use system proxy settings to Manual proxy configuration
- Enter
web-proxy.rcc.fsu.edufor the HTTP Proxy field, and3128in the Port field (refer to the image below) - Check the Also use this proxy for FTP and HTTPS checkbox
- Click OK