Jupyter Notebooks
Jupyter Notebook is a web application for creating and sharing computational Python documents.
This application is available in Open OnDemand.
We provide an interactive app for Jupyter Notebook using the Open OnDemand HPC web portal.
Run Jupyter Notebooks using Open OnDemand#
From the Open OnDemand dashboard, select Interactive Apps → Jupyter Notebook. You will see something similar to the following screen:
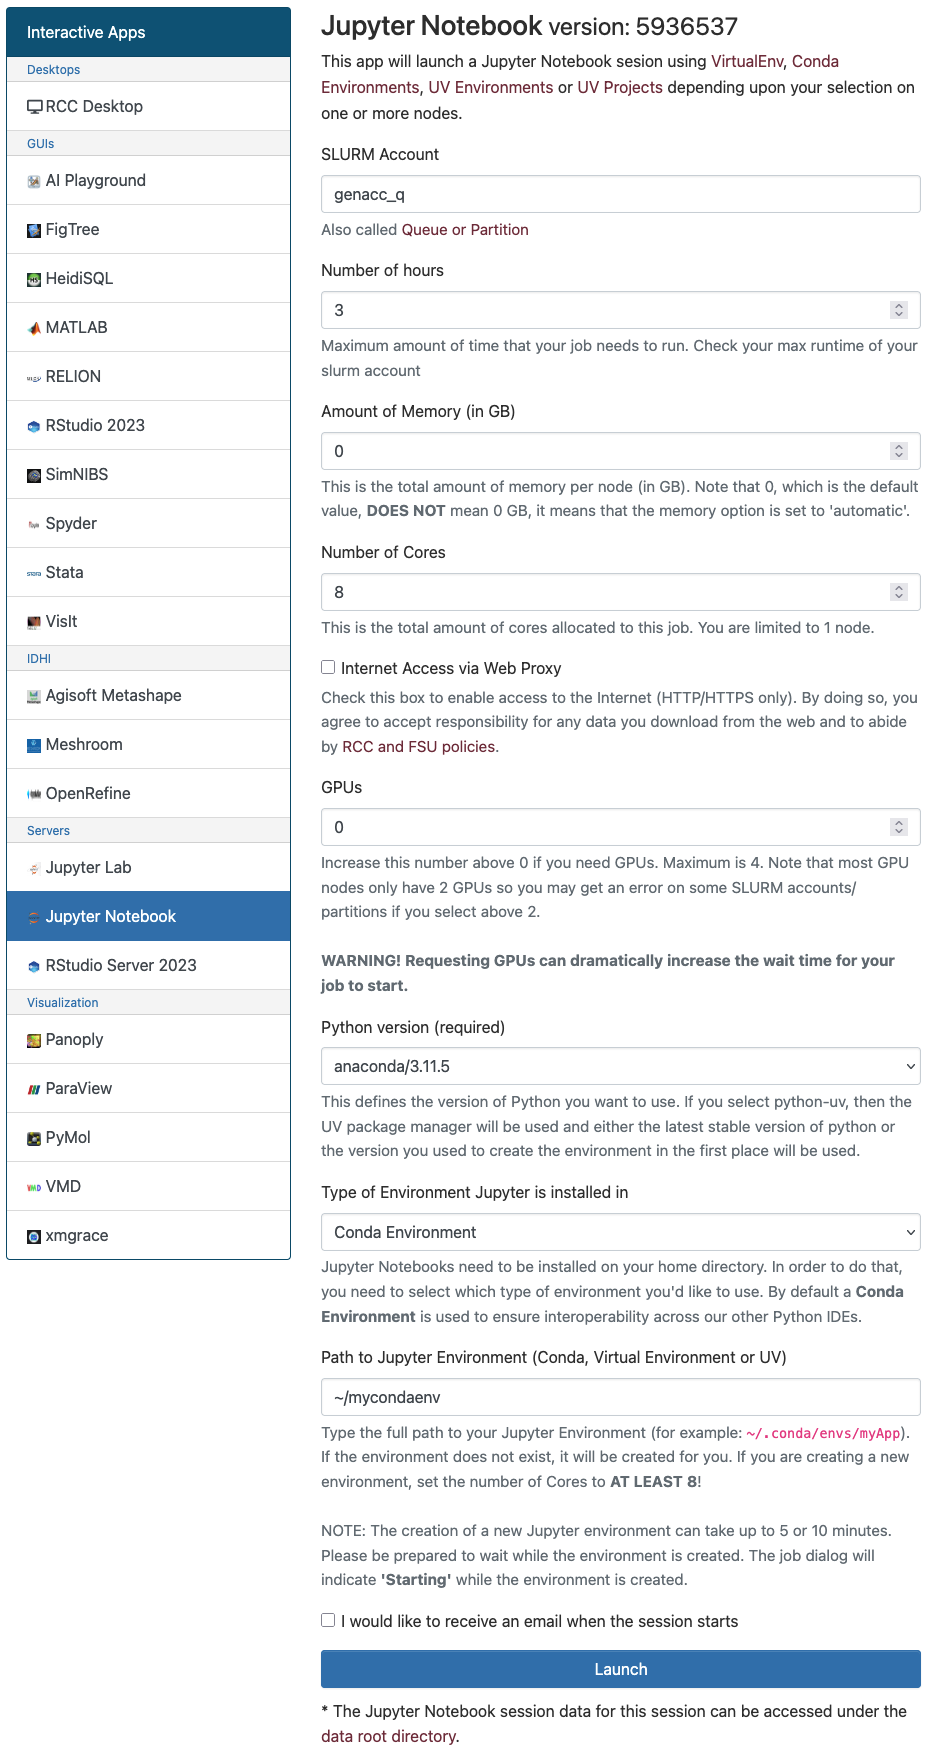
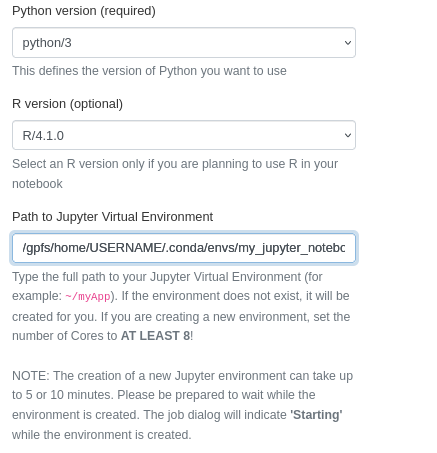
When selecting your job specifications, it is important that the Enviroment Type parameter and the Python version parameter are compatible. The following are valid combinations of these parameters:
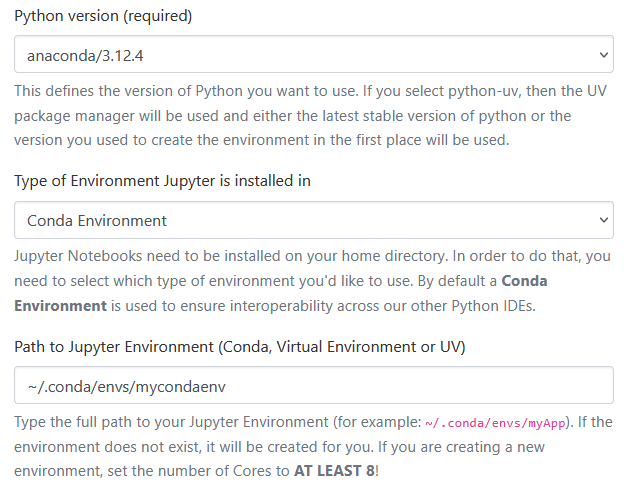
Python Version: Anaconda module and Environment Type: Conda:
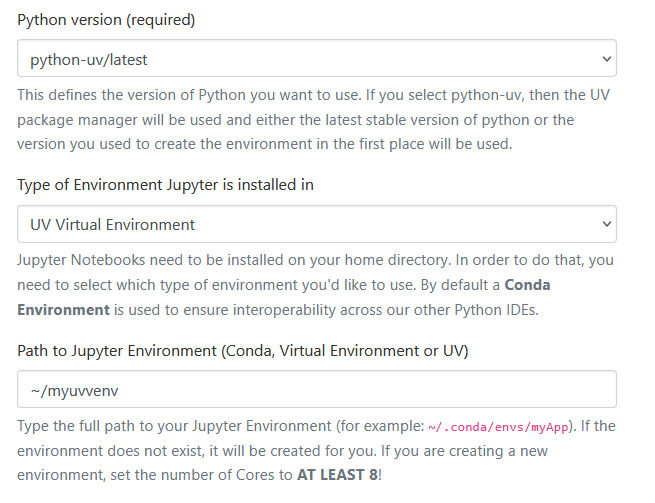
Python Version: "python-uv" and Environment Type: UV:
Or, if using a UV Project:

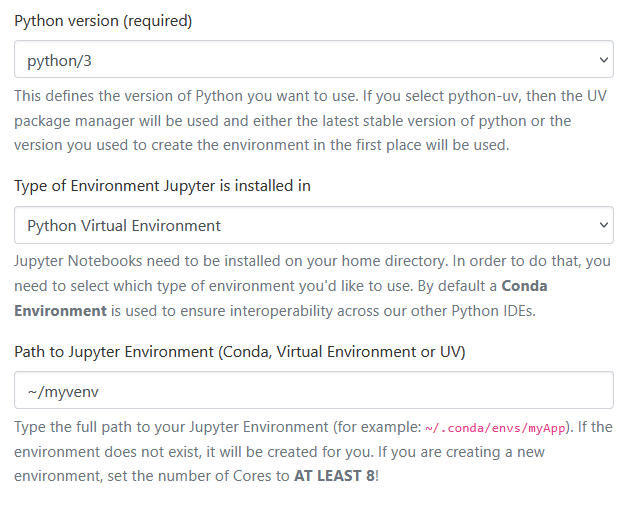
Python Version: "Python/3" or "python-uv" and Environment Type: Virtual Enviroment:
The same compatibility rules apply for using JupyterLab on Open OnDemand.
Path to Jupyter Virtual Environment: Enter a new or existing path to a Jupyter Notebook environment
- If such an environment does not exist at the given path, the system will generate one for your project. If you are building a new environment, you should specify a value of at least 8 for the number of cores. Your job will remain in Starting mode while the environment is configured. This can take up to 10 minutes.
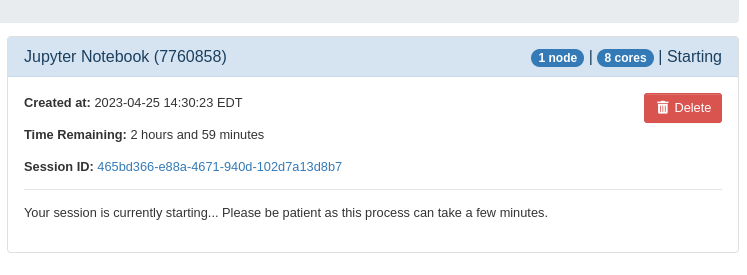
If you are connecting to an already existing Jupyter Notebook environment, your environment will load immediately after your job starts.
Manually configuring a Jupyter Notebook environment#
You have the option of manually building and configuring a Jupyter Notebook environment, rather than using Open OnDemand to automatically build it:
To run your newly created notebook on Open OnDemand (see above), take note of the path that the
environment location: that was printed during the conda create output:
Enter this path into the Path to Jupyter Virtual Environment field in Open OnDemand:
Accessing Files Outside Your Home Directory#
By default, Jupyter sessions launched through Open OnDemand are restricted to the user's home directory. This limitation is due to Jupyter's internal configuration, which prevents access to directories outside the home path. Consequently, files stored in /gpfs/research or other locations outside your home directory cannot be directly accessed or browsed within Jupyter.
If you need to access your research storage from within Jupyter, you can create a symbolic link from your home directory to your research folder.
Workaround Steps#
- Open a terminal (either through Open OnDemand or SSH).
- Create a symbolic link from your research directory to your home directory using the following syntax:
For example:
This creates a symbolic link called scratch in your home directory that points to /gpfs/research/scratch/abc25d.
Once created, you can navigate to scratch in Jupyter as if it were a normal folder, and access your research data.
Using R with Jupyter Notebooks#
Our Jupyter Notebook Open OnDemand app automatically loads "R" and installs the necessary dependencies to use R with Jupyter Notebooks.
Select the version of R that you would like to use on the job submission screen:

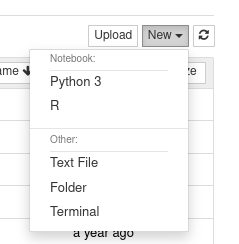
Fill out the remainder of the form, and then follow the instructions above to submit your job. When the job starts, press the "New" button at the upper-right hand corner of the Jupyter notebook screen, and select "R":
Manually install the "R" kernel in Jupyter#
If you need further customization, you can manually install the "R" kernel in your Jupyter Notebook environment.
You can now run "R" in your Jupyter Notebook session.